Tool Guide: How to Use the Gradient Tool in Adobe Illustrator

Revamp your designs by applying colorful gradients to solid vector shapes and typography. Use this guide to learn everything you need to know about the gradient tool in Adobe Illustrator.
Applying Gradients to Strokes
You can apply gradients to strokes just as they’re applied to solid shapes. In the Gradient Panel in Illustrator, click and drag the Fill over to the Stroke box to copy the gradient over as a stroke.
There are three options to modify the gradient stroke:
The first command applies the gradient within the stroke, mimicking how it’s applied to a solid shape.
The second dialog box creates the gradient along the stroke; this command is best applied to a line segment or an open shape due to its abrupt stop.
The third command creates a gradient across the stroke, starting the blend of color from the outer perimeter and transitioning inwards.
Cover image via Plasteed.
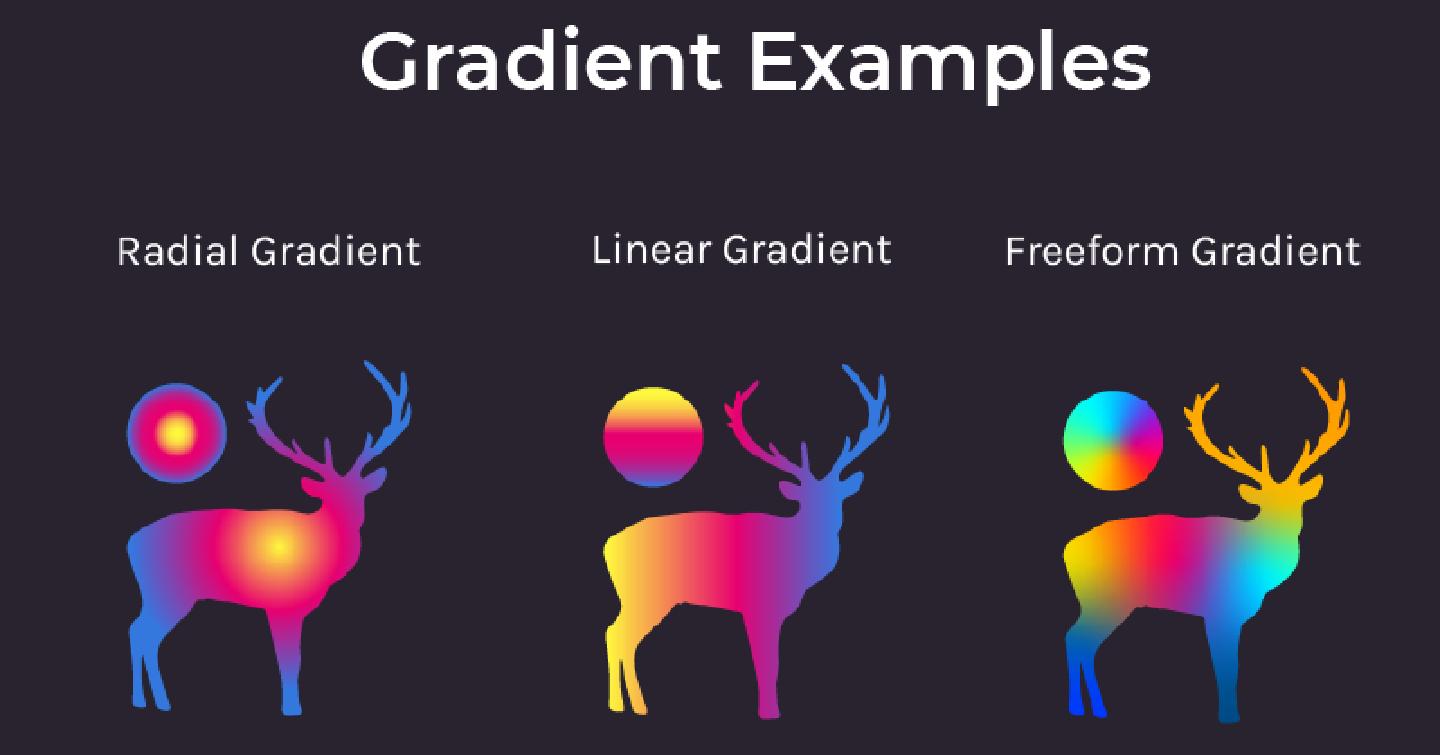
A gradient is a transition between colors of different values or hues, typically applied to a solid shape or text. They’re inescapable in the creative realm, often used in branding, typography, logos, and web design elements to create visual interest. Instagram features an eye-catching (and infamously controversial) gradient in their logo, while Asana grabs your attention with mesmerizing sunset gradients sprinkled across their website and logo elements.
Gradients have existed as a creative trend for years on end, but there’s always a contemporary spin on the classic gradient. Modern takes range from vivid fluorescent gradients to more subtle monochromatic gradations. No matter the style, they’re one of the most popular and useful elements in design.
Use this guide to learn everything you need to know about the gradient tool in Adobe Illustrator.
Getting to Know the Gradient Slider
You can apply gradients to vector shapes in many ways. Simply select a shape with the Selection Tool (V) and show the Gradient palette (Window > Gradient).
Apply a default gradient to your shape by clicking the Gradient box in the top left corner of the panel. Select the dropdown to view other gradient presets, or head over to the Swatches panel and choose from the Gradient Swatches.
I prefer to add my own custom swatches to the gradient slider for a more unique look. Start by applying a default gradient, then drag hues from the Swatches panel to the gradient slider. You’ll notice a plus sign pop up when swatches are successfully added to the slider. Stick to a few swatches for a smooth gradient; too many colors can easily overwhelm the gradient.
When pairing colors together on the gradient slider, think about how the colors might blend together. A bright yellow would not mesh well with a dark green; instead, combine colors with similar characteristics, or analogous colors. Blues blend well into purples, and yellows blend well into oranges and reds. Read more about analogous colors and other color theory concepts.
You can adjust each gradient stop within the slider based on the color space you’re in. Simply double-click the gradient stop to specify a new color with CMYK or RGB sliders, or replace the color altogether with another swatch.
By clicking and dragging the gradient stops, you can adjust the position of each hue. A hue’s location changes the overall appearance of the gradient. Colors positioned nearby on the slider will blend much more abruptly than colors positioned further away on the slider.
It’s easy to delete a gradient stop from the slider. Simply select the gradient stop you want removed, then click the trash can icon to delete the stop. Hold down the Option key and drag across to duplicate the gradient stop.
You can easily reverse the direction of your gradient by hitting the Reverse Gradient button above the gradient slider. This will flip the colors in your slider and alter the gradient shape.
Saving a Gradient to Swatches Palette
It’s a good idea to save your gradients as a swatch so that you can refer back to them in your designs. If you’re using the gradient in branding elements or in a campaign, you’ll be able to use it over and over again. In the Swatches panel, click on the hamburger dropdown, then select New Swatch.
This will bring up a dialog box to enter your gradient swatch name. After selecting OK, you will see your own gradient swatch living in the Swatches panel. You can apply this gradient swatch to any vector shape in the program with just one click.
Changing Gradient Direction and Radius
Linear gradients can flow in any direction. Click on the vector gradient with the Selection Tool (V) and navigate to the angle dropdown above the gradient slider. Angles in 45 degree increments will create a diagonal gradient effect; angles in 90 degree increments will blend from one side of the shape to the other. Experiment with different directions to see which angle works best for your design.
By default, radial gradients produce a more circular appearance. You can adjust the appearance of your radial gradient by navigating to the Aspect Ratio dropdown beneath the Angle command.
An aspect ratio of 100% produces a circular gradient, values less than 100% create a horizontal elliptical gradient, and values more than 100% stretch the elliptical vertically.
Applying Gradients to Compound Shapes
While gradients are typically applied across individual vector shapes, you can easily create one gradient across multiple vector paths. Draw out your vector shapes with the Shapes Tool and then drag your cursor across all shapes to select them. To make a compound path, click Command+8 or go to Object > Compound Path > Make.
Compound paths treat multiple paths as one cohesive unit. This disperses your gradient across multiple shapes
To release the compound path, click Shift+Option+Command+8 or navigate to Object > Compound Path > Release.
Searching for more tips and tutorials to expand your Adobe Illustrator knowledge? Check out these articles:
